DIY How to Make A
Piano String Cover

Step-by-Step INSTRUCTIONS.
DIY How to Make a Piano String Cover.
"Why do I need a piano string cover?" you might ask.
A
grand piano wool string cover determines the life and death of your
piano's strings and other metal parts contained within top side of your
piano, where the majority of metal resides.
A wool string cover helps to protect and preserve your piano for several decades longer than keeping no such string cover in place.
Rust and corrosion naturally form on the metal components inside of a grand piano (upright pianos are not designed to accommodate a string cover), in climates with even a slight degree of humidity, throughout the year.
These metal components of the piano consist of the following:
- Cast iron plate
- 200+ tuning pins
- Bridge pins
- Hitch pins
- Agraffes
- Screws & bolts
- The mechanical action's assembly & working parts
- Damper wires, and most importantly...
- The metal strings - both steel and copper wound.
These components become rusted and degrade over time from the smallest traces of moisture contained within the atmosphere, known as "humidity", or the amount of water vapor that's carried in the air.
Even
a small amount of humidity (<20% or less) can take its toll on a
piano's metal components over the course of its lifetime.
A wool string cover helps to repel moisture, helping to keep these metal components in top shape, free of any rust, corrosion, and damage, and results in adding decades of life to these metal parts.
When a string cover is in place, rust has a lesser chance of eating into the metal parts of the top portion of your piano, thus breaking down the integrity of their function and structure.
ORDER YOUR WOOL BLEND
PIANO STRING COVER
MATERIAL HERE:
You will need these materials, in order to make a piano string cover:
- 100% wool fabric or a wool blend fabric.
- Scissors, preferably ones used in sewing.
- Masking tape or scotch tape.
- A piece of chalk.
- A clean, microfiber polishing cloth, to wipe the piano's top lid clean, before tracing the material.
- A clothing iron, to eliminate any creases in the wool.
Before You Begin:
1) Use a warm clothing iron to iron out any creases or wrinkles in the wool material, before spreading it over the piano's top lid.
2) After folding the piano's music desk down into the "rest" position, SLOWLY and CAREFULLY PULL OUT THE MUSIC DESK FROM THE PIANO WITH TWO HANDS - OR WITH TWO PEOPLE - one on each side.
After it nearly slides out, lift it out of the piano, carefully, making sure it doesn't fall from your grasp only to damage the piano's finish, or to possibly break the music desk.
Set the music desk aside where nobody will step on it, or where it will not fall down (such as from a couch), becoming damaged in some way.
3) You may want to clean the inside of your piano. before setting the final product inside (see Video at 6:39, below)
4) Close the top lid of the piano, 100% until the lid is completely shut over the piano. The top lid must lay completely flat, before you can trace the wool material on top of the piano's lid.
DIY - How to Make A
Piano String Cover
INSTRUCTIONS:
Step 1: Wipe away any dust or fingerprints from the piano's top lid with a clean microfiber cloth, before laying down the wool material over it.
Step 2: Lay the wool material over the top lid, so that its straight edge length is aligned with the left, straight edge of the piano's bass side of the top lid.
Step 3: If the material does not cover the width across the top of the lid 100%, slowly move the material to the right about 1" to 2" from the left straight edge.
Make sure the wool aligns straight with the left edge of the piano's top lid towards the middle, when moved over 1" to 2".
Step 4: Tape down the material onto the piano with painter's tape, exactly where it fits evenly across the lid, using 8" pieces. Make sure the material doesn't become off-center as you are taping it down onto the piano's lid.
TIP: Make sure the tape you are using doesn't affect the piano's finish, or "peel" it off, in any way. Test the tape in a small, inconspicuous area of the finish, before taping the material onto the piano's top lid completely. Masking tape and painter's tape usually works best as it usually has a very "weak" amount of adhesive.
If this tape fails to keep the wool material in place, test Scotch Tape on an inconspicuous area of the finish, and use as needed.
Step 5 - Important Step: Make sure the left edge and the front straight edge (nearest the keys) are aligned straight, when the wool is taped into place.
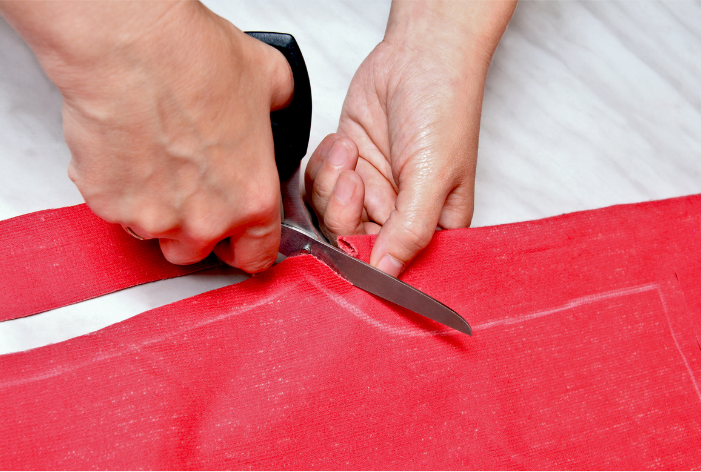
(PICTURED: STEP 8)

A WORD OF CAUTION: DO NOT CUT THE FABRIC DIRECTLY ABOVE OR NEAR THE PIANO.
CUT IT AWAY FROM THE PIANO IN ORDER TO AVOID SCRATCHING OR DAMAGING THE PIANO'S FINISH.
ALWAYS PRESERVE YOUR PIANO'S OUTER CABINET & FINISH WITH THE UTMOST CARE.
Step 6: Trace the curved edge of the back lid with a piece of chalk. As you're tracing the lid, use the long side of the chalk to lightly press against the "sharp" edge of the lid and the wool material, for the best results.
Make sure the material stays completely still, in the CORRECT PLACE AROUND THE PIANO AS YOU'RE TRACING IT, so that it doesn't move around, accidentally, while being traced.
Step 7: After tracing the curved edge of the piano's top lid with chalk, remove the material and tape from the piano.
Step 8: After REMOVING THE MATERIAL AWAY FROM THE TOP OF THE PIANO, cut along the chalk outline with scissors AWAY FROM THE PIANO so as to NOT SCRATCH THE FINISH.
ONE LAST TIME:
DO NOT CUT YOUR STRING COVER ON TOP OF YOUR PIANO [!! !!!]
CUT IT AWAY FROM THE PIANO, SO AS TO NOT SCRATCH YOUR PIANO'S TOP LID.
Step 9: After the material has been cut on the chalked line, open up the piano's top lid to the full prop position.
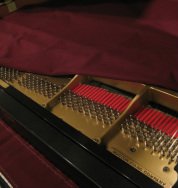
Step 10: Set the newly cut string cover inside of the piano.
Notice any areas that may either need to be tucked into the rim and the plate -OR - that may need to be cut away altogether -- mind you, CUT ANY MATERIAL OUTSIDE of and AWAY FROM THE PIANO.
Mark these 'excess' areas with chalk inside of the piano, and cut it OUTSIDE OF THE PIANO, accordingly.
Step 11: If the material is sagging down in any of the sections between the cast iron struts, use a thin wooden dowel to keep it in place, underneath the string cover.
Use a light weight <1/2" thick by >24" long piece of rectangular/squared wood from an Arts & Crafts or Hardware store, to support the cover above the bass strings or in other areas across the top of the strings inside of the piano, between the plate struts.
These wooden dowels can be covered with excess felt remnants, after cutting the cover to size, and can be attached with Velcro and glue (outside of the piano) on the bottom side of the cover, to stay in place.
CALL with ANY QUESTIONS:
1-866-488-5397 (KEYS)
Or, CONTACT US FOR ASSISTANCE.
SUBSCRIBE TO OUR FREE EZINE:
Support our site at no cost to you. Make your Amazon purchases by clicking through this link, here.


 Click Here to View our Terms and Conditions